
If you’re like me (or following me), you may have seen pins floating around pinterest about extra-large “engineering prints.”
The idea is that you can go online to Staples (or another print company) and print extra-large, black and white prints on your favorite pictures for cheap. Really cheap. As in, $1.79 for an 18 x 24. And if you choose to pick them up in your local store, shipping is FREE.
As far as I know, this is by far the cheapest way to print large pictures. Even if you find a great flash deal on a canvas or print, they’re still significantly more expensive.
I know what you’re thinking: what’s the catch?
For starters, these prints are black and white. That’s totally fine by me. Black and white prints are my favorite.
Secondly, these prints are “draft quality,” at best. They’re engineering blueprints. Since it was so cheap, I was willing to gamble. And I am glad I did! My prints have a vintage, aged look.
Check out this comparison of my beautiful baby girl:
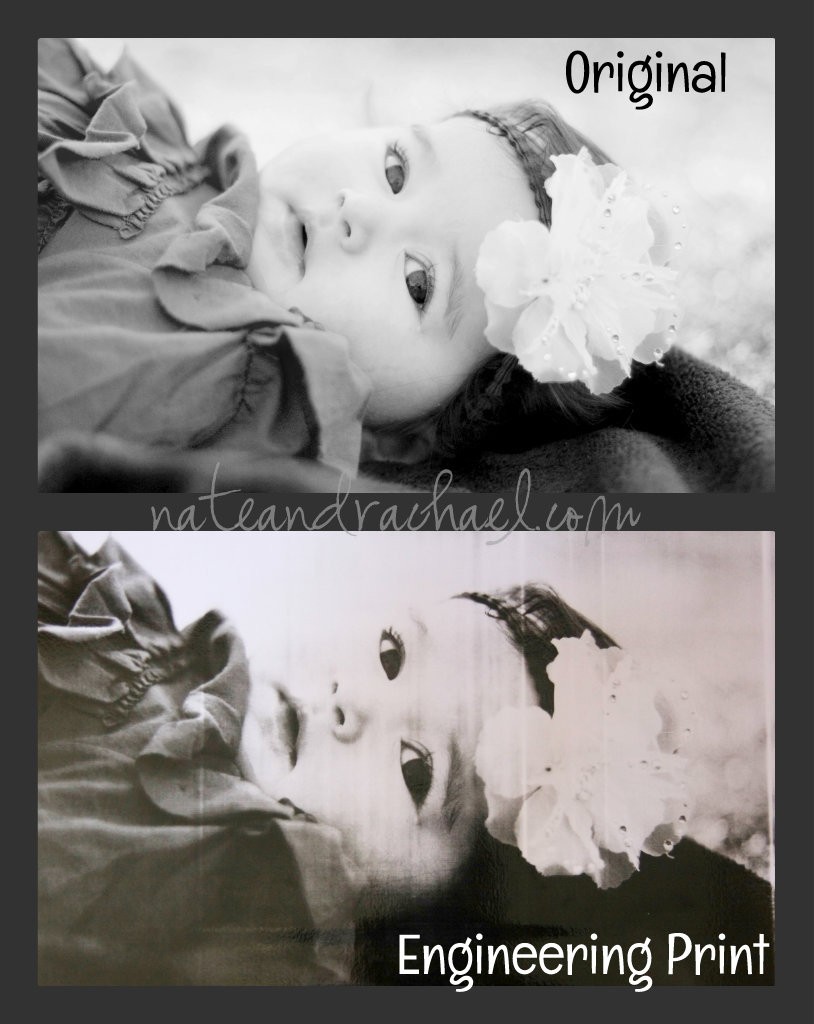
I was sorry to lose some of the detail that was found in the original image, but the print is still striking.
Finally, because these prints weren’t intended for pictures, the paper is thin and tears easily. This is what scared me most. I found several tutorials (you can find them here and here) that give instructions for mounting these thin prints. The finished products are awe-worthy. But the process was off-putting. I wasn’t interested in messing with super glue, spray adhesives, and clear finishing sprays. And I didn’t want to worry about bubbles, wrinkles, or tears.
But guess what? You don’t have to deal with the hassle. Your print shop should be able to do it for you! My local Staples was happy to mount my pictures to foam board for just a few dollars more. All in, I paid less than $15 for two extra-large prints that were already mounted to foam!
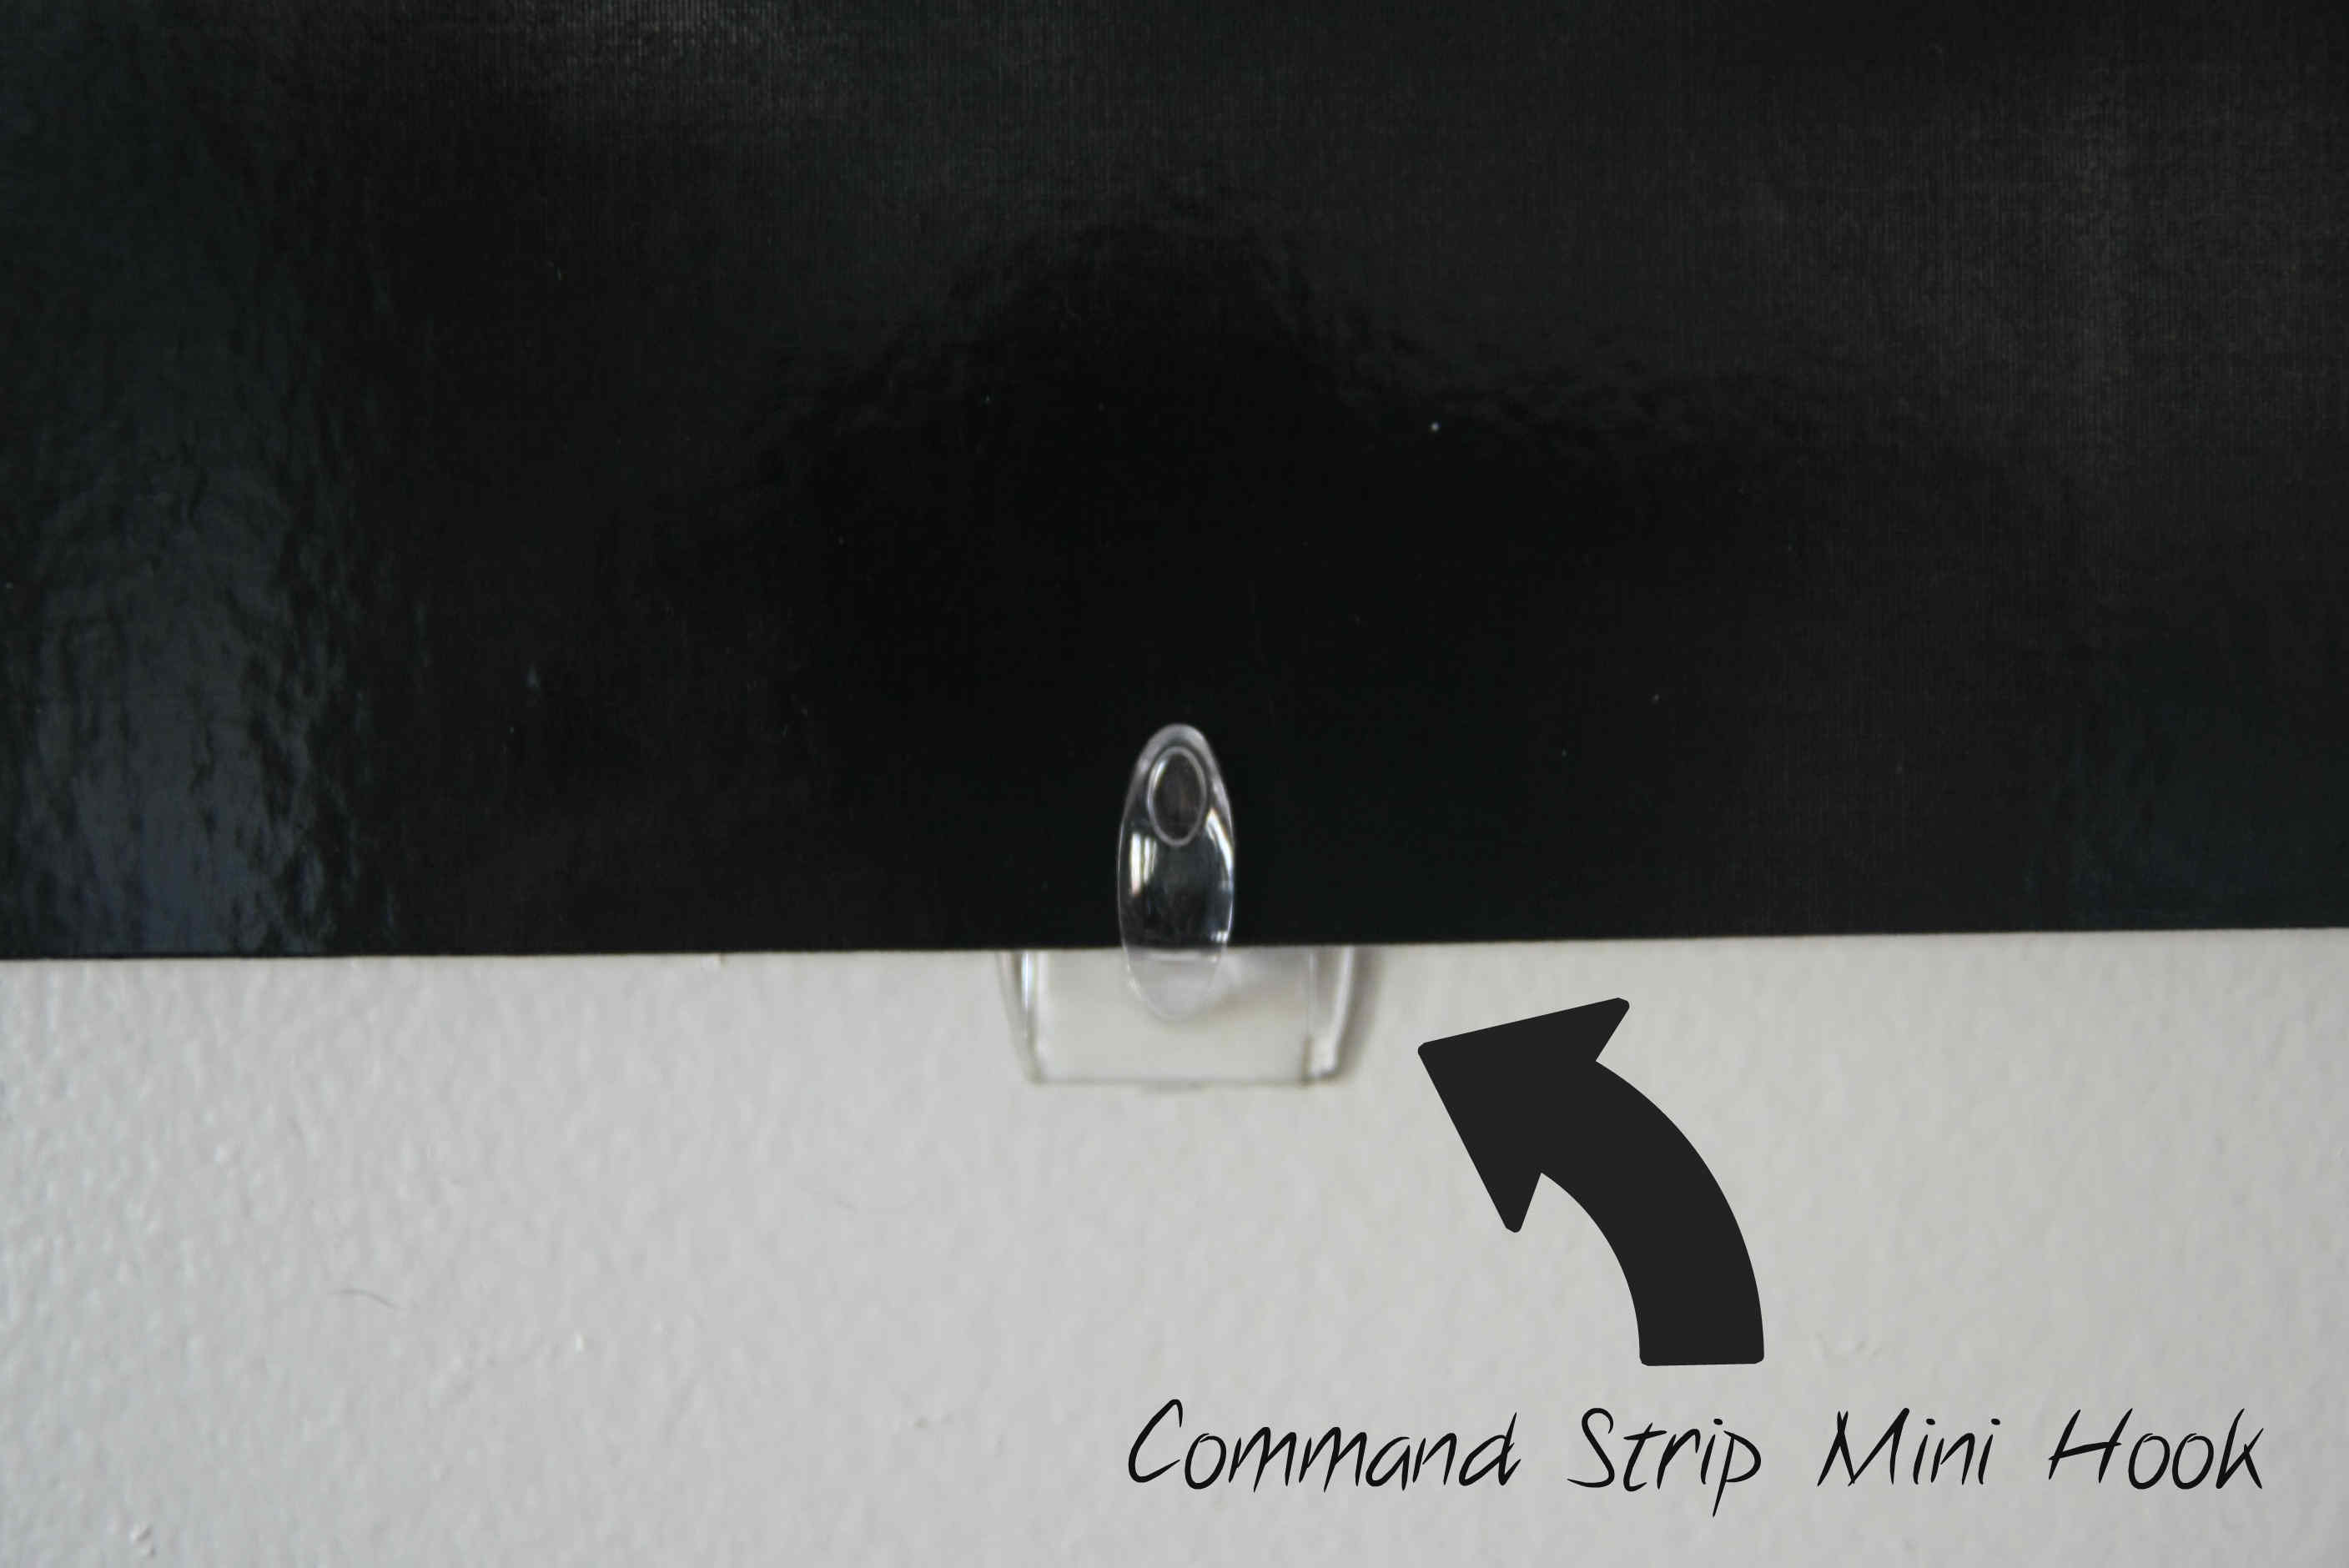
Okay, so once you get your oh-so-cheap prints home, what do you do with them? I’ve yet to find extra-large frames that are cheap enough to suit my fancy, so we (well, okay, NATE) mounted ours with command strip mini hooks–two per picture. There’s no permanent damage to the walls, and we can change out the prints as often as we’d like!

Need a better visual of the hook support? How about this?
If you’ve experimented with engineering prints, I’d love to see how yours turned out! Upload them to our facebook page!
Want to do more with your pictures? Check out this easy tutorial on how to make a milestone picture.
Do you follow us on facebook? Pop on over and like our page!
Hey Rachael, when you turn your photos to black & white (I forget which program you use), do you have the option to change the different black & white formats? I have only ever used photoshop & I know w/ that, you can change it to “Scenic”, “Portrait”, etc… and I have noticed with a lot of your photos that it looks like Scenic, vs. Portrait style. I use that sometimes, and I’m looking at Zella’s pic, and thinking that if you did it in Portrait instead, the outlines of her face would be a tad darker, and then they’d show up more in the bigger print. Just something to try out if you’re able to play with it a little! I usually use Portrait, and then play with the brightness. But sometimes it looks better in one of the other formats.. always fun to play with that stuff!
You are the photo guru! Thank you for your advice! Do you know what actually changes when you switch from scenic to portrait? I adjust the black and white manually (and the final product is usually based purely on emotion/feeling. I’m very technical like that. Ha!). I usually overexpose a bit and increase the shadows. I would love to end up with pictures like you described!